Showing posts with label Treat Holders. Show all posts

Tuesday, February 14, 2012

A Valentine Treat!

HAPPY VALENTINE'S DAY!! :)

Thought I'd share what my daughter and I have been working on for the last couple of weeks (off and on). ;)  She really loved one of the Make'n Takes that I had the gals do at my recent SAB/Occasions Mini workshop, so that's what we did. I stocked up on Valentine M&Ms when they went on sale, and we got started.

Here's a view of the one my workshop gals made:

The Details:

* Cherry Cobbler cardstock, Whisper White cardstock punched with our Postage Stamp punch.

* Red heart is stamped with I {Heart} Hearts stamp set in Cherry Cobbler ink, then punched out with the Heart to Heart punch, and glued on. The smaller heart you see is Pretty in Pink cardstock punched with the Heart to Heart punch and glued on.

Insert M&Ms into plastic sleeve (SU's cello treat bags - a Holiday Mini carryover item), pull off backing, fold over. Fold tented cardstock over top, then staple. Add decor over top of staple, and VOILA! :)

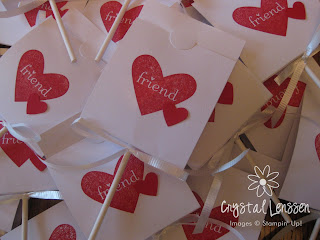
Here's pictures of what my 2nd Grade daughter did - she changed it up a little! :)  Definitely knew what she wanted, no matter how much mom may have tried to talk her out of it (wink). You know what? She was totally right. So cute the way they are - she definitely has an eye for it. SERIOUS! I do ask her opinion from time to time, while I'm crafting, too.  I should've known they'd turn out cute. :)

What's the difference, you ask?

She wanted all RED toppers for the boys, and all PINKs for the girls. :) None of this mixing of red and pink. ;-)

Boys: Cherry Cobbler ink and cardstock

Girls: Melon Mambo ink and cardstock, Pretty in Pink cardstock

Before you get too excited, there aren't THAT many kids in her class. She wanted to add a few for her teacher, Principal, etc...

Here's a closeup of the backside. We stamped a "to/from" (from an old stamp set I refuse to get rid of), then she filled them all out.

Kinda glad to have all the piled-up treats out of the house now. ;-)


Oh, wait a minute!  You're wondering what my Pre-K daughter did for HER treats, aren't you?  I thought so. ;-)


Here's a little peek (yes, forgot to take an after picture):


We did the same thing my eldest (the now 2nd grader) and I did when she was in Kindergarten. Luckily, I wrote about it back then. :)

The only difference is a little bit off on color, and and I used red curling ribbon, curled...instead of what you see in this post HERE (contains a link to the tutorial, too!)


Well, what do you think? I'd love to hear from you! :)

Thank you so much for stopping by, and have a GREAT Valentine's Day! :)
Crystal

Monday, February 6, 2012

A Little Treat

Remember my last post where I showed you a card I made using the new Framelits die?

Well, I'm back to show you something made with it - AGAIN!
This time, a lovely little treat. :)

I always like to include a little "thank you" treat with orders placed when I have a party at my home (Open House, SAB, etc).  Here's what I made up this time:

It's a little difficult to see the lovely swoops on the edges, but they are there! :)

I used the "Twitterpated" DP from the Occasions Mini catalog for the main part, then punched a hole at the top to tie the tag to.

The tag is our Postage Stamp punch in Riding Hood Red, and the "thanks" image is from the Pretty Postage stamp set. I colored the top and bottom "thanks" with Blushing Bride marker, and the middle one with our Riding Hood Red marker, then punched it out with our 1" Square punch.

The ribbon is the Lucky Limade color from the Everyday Enchantment Ribbon & Brad Pack. A SALE-A-BRATION freebie! :)

Inside the treat holder are two packages of Smarties. :)

Well, what do you think?

Thanks so much for stopping by, and have a GREAT day! :)
Crystal

Friday, December 23, 2011

Three Projects!

Sorry, this post is late today...gone all morning, then wrote this while making blackberry jam this afternoon. Requires some concentration. ;-)

Wednesday was my BIRTHDAY (yay - I love birthdays!), so I didn't make it to the computer all that day!  Thursday was last minute preparations for Christmas.  Thought maybe I should make up for it with three projects today - one for each day since I last posted?  How bout that...sound good?

Two of the items are treat holders, and one is for a different kind of treat...you'll see. ;-)
All three items use the designer paper "Frostwood Lodge" - available only until Jan 3!!

FIRST up, is a container called a "sour cream container".


Also used:  Marina Mist grosgrain ribbon, ink, and cardstock, Cherry Cobbler and Whisper White cardstock. Stamped snowflake from Season of Joy and added a bit of bling in the center with our clear rhinestone.


SECOND, a little "purse" of sorts, made using the Top Note Die and Big Shot.


Also used: Marina Mist grosgrain ribbon and cardstock, Cherry Cobbler cardstock, clear rhinestone, and Triple Layer Bouquet Punch. Oh, and our small cello bag. :)


 LAST but not least, our THIRD project for today...


What IS inside that holder, you ask???


A different sort of treat. ;-)


Besides the Frostwood Lodge designer as used in the other two projects, I used the stamp set Season of Joy again, and some punches - scalloped circle, 1 3/8" circle, and lace ribbon border (?)...the red you see in the center of the white lace is actually the  Cherry Cobbler quilted ribbon.


WHEW!!  Took me several hours to finish, but finally here's the THREE projects I promised today. :)  Well, what do you think?

Thanks so much for stopping by, and have a GREAT day! :)
Crystal

Tuesday, December 20, 2011

Chocolate Tub??

Hee hee...NOPE, I do not have a chocolate bathtub.
I just can't think of a proper name for this little treat, lol! 

Here's another of the samples I mentioned before...
Actually, this doubles as a sample AND one of the items I sold here!

"All you need in life is a friend who has chocolate."

I made some of these that were "friendsy," as well as some with a Merry Christmas greeting.

INSIDE: Hershey Kisses. :)

"TUB": Baby food container! :)
Stamp Set: Eat Chocolate
Colors: Early Espresso, Cherry Cobbler, Whisper White

Perfect for a sweet little gift!
Well, what do you think?

Thanks so much for stopping by, and have a GREAT day! :)
Crystal

Monday, December 19, 2011

Two For Tea?

Remember the crazy 24+ samples in one week?

This is one of them, a nifty little treat holder. :)

LOVE the colors.
Cherry Cobbler cardstock base.
See the texture? It's Cherry Cobbler cardstock embossed with the Vintage Wallpaper embossing folder, then sponged with Early Espresso ink.

The scallop circle is our large scallop circle punch in Early Espresso, and the stamped image on Very Vanilla cardstock is from the stamp set Easy Events.

See the brown ribbon between layers?  It's the new quilted Early Espresso ribbon in the Holiday Mini! LOVE it.


Would you like to see what's inside? I'm guessing you have a clue, but...OK. :)


Tea...for TWO! :)

A neat little gift for secret pal, someone at the office, or just because...


Well, what do you think?

Thanks so much for stopping by, and have a GREAT day! :)
Crystal

Friday, December 16, 2011

Thank You Treat

Quick post today...

Thought I'd share the Open House thank you's I made to include in the gals' order bags.


Soft Suede and Very Vanilla cardstock
Spice Cake Designer Paper
Easy Events stamp set
Aquapainter & Ink pad lids
Pool Party ruffled ribbon


Would you like to see the inside??
OK. :)


I always like to include some kind of little treat. :)


Well, what do you think?

Thanks so much for stopping by, and have a GREAT day! :)
Crystal

Tuesday, December 13, 2011

Open House Treat!

So, a week after I debuted at my first Craft Show, I held my Annual (Stampin' Up) Holiday Open House at my home. Crazy? YES.

Funny thing though...usually I stress out about the Annual Open House. It's interesting what insane craft mode for 3 weeks straight will do to your psyche. After that, I thought...Open House? Bahhh...no biggie! :)

So where I'm usually making tons and tons of new samples, this year I limited myself to 24-ish, combined with "older" samples that were still legit (not retired product). Kind of nice...however, 24-ish samples (cards AND gifty stuff) done in a week...still a little crazy. ;-)

I always enjoy my time with the ladies who come...some of them I don't see but 1-2 times a year, so it's exciting to see them again and catch up.

In the past, I've offered a couple of free make n takes, and this year was no exception.

I had the card figured out, but had the gifty-item narrowed down to three items. The first, I'm just WAY too embarrassed to show you, lol. It was one of those things that you have this idea, and when it comes to fruition - yeah, not as lovely as you pictured it. ;-)

Here's the runner up (didn't make the cut):
Keep in mind the Open House was on NOVEMBER 19th (wink)


I really liked it, but yet...it just wasn't quite right. It's a rather large scallop die for the Big Shot. It needed two pieces cut, scored at a certain point, and adhered together - I felt it wasn't very easy to line up the two at the bottom.


Instead, I wanted to make something which maybe had more uses, and came up with THIS:

First, it uses the Sizzix Two Tags Die. You get two different cut outs from one die - more for your money! :)  Anywho...whereas the above project is DEFINITELY pumpkin-y, I felt like this one could be changed up to reflect different holidays/birthdays/baby shower/wedding shower, etc. So that's why I chose this project...plus it was a little easier to put together. :)

See the texture?  It's the Vintage Wallpaper embossing folder. And the leaves? Little Leaves sizzlit.

Yes, we used a lot of BIG SHOT. :)

The ribbon is our 5/8" chocolate satin ribbon, tied with our hemp twine. The stamped sentiment is from Grateful Greetings, which I punched out with the large oval, and backed with the scallop oval punch.

Wanna see what's in it?? OK. :)


What ELSE could it be in November? ;-)

Stampin' Up's small cello bags held the treat nicely. :)


Well, what do you think? Try to look beyond the fact that it is now December. ;-)

Thanks so much for stopping by, and have a GREAT day! :)
Crystal

Monday, December 12, 2011

Craft Fair Pictures!

Yes, I'm still around. :)

If I'm being honest...it's been kind of a nice break. Things have been rather hectic in my life, and I just *had* to cut something out or I think I may have gone crazy!  It's been good to slow down and focus on my family, and myself too.  Taking time to be still. In many ways.

Things are much better now, and I'm looking forward to a quiet, reflective Christmas season. :)

There were a few of you that asked to see pictures of the Craft Fair stuff when I got around to it...so I'm finally getting around to it. Thank you for being patient with me as I sort out stuff. :)


Here's a view of my "shop" head on. Not the easiest to see what's going on...lots of distracting things in the background. :)


I had kind of a "kids" area set up, with notebook sets, bookmarks, tooth fairy tins, playdoh fun, etc.


Something new I tried was homemade decor "wipeboards" - more fun than the standard white kind  Included a dry erase marker w/ velcro, and wrapped in cello. :) 


A few different things pictured here...my tile coaster sets, magnets, gift card holders, etc...


Since I sell my signature cupcake toppers on my Etsy site, I decided to have a few (ahem) of those on hand as well...(I need to update the listings on Etsy, but there are a few listed there).


We're full circle now..

Here's another little "gifty" section...this one a little more "food-related". Chocolate tins, Snowman kisses, Snowman Soup mug sets, M&M sticks, and more.

The items on the Christmas Tree are hanging gift card holders, also available in my Etsy shop Christmas Section. :)

WHEW!!  Can I just say I'm a *little* glad to be done with that, my very first Craft Fair?? (wink)  Especially considering I signed up 3 weeks before the event....and made everything in that time?? lol

Overall, it was a good experience...one in which I learned many things, and met many great people! :)

Stay tuned for Stampin' Up Open House pics and projects next time...

Thanks so much for stopping by, and have a GREAT day! :)
Crystal

Tuesday, April 26, 2011

5 Days Left for Cake!

Did you know there are only 5 days left to order from the Occasions Mini catalog?
That's right, only 5 more days to get your hands on Nature Walk, Take A Spin, Build A Blossom, Easter Blossoms, Blessed Mother, Eat Chocolate, Create a Cupcake, and more!!

And one of my personal favorites...Bring On the Cake.
Here's a little project I made awhile back (when I had my SAB party) using that stamp set and a color that is *slowly* growing on me...

Here's a closeup of the lovely cake...in all it's glittery gloriousness! :)


Just in case you're wondering, the color is Poppy Parade. ;-)

The dotted DSP is paper from the Hostess Paper Pack, and I used markers to ink and color in the stamp. Oh, and don't forget the matching ribbon! ;-)

Did you know you can order online from me, 24-7? Yup. Totally.
Just click here to get started (then click shop now)!

Well, what do you think?

Thanks so much for stopping by, and have a GREAT day! :)
Crystal

Friday, March 25, 2011

Happy Polka Dots

Weird title, I suppose.
Except that it reminds me of my friend (and her birthday gift).
Polka dots. She likes them. Happy. She is.

She's a fun-lovin', bubbly, chipper, spitfire, full of energy kinda gal.
She would probably try to dispell that - or at least blame her creamerized coffee. ;-) And yes, I know...she's a normal person and probably isn't happy 24-7...but she's got a great outlook on life and it shows.
It makes me happy just to be in her company. :)
She has a great sense of humor.
She's uber-talented, a creative genious!

Greets with a hug (I love hugs!), and has a beautiful smile that lights up the room.

She listens. Advises.
We enjoy chatting/commiserating over creamerized coffee. :)
Did I mention she loves chocolate like I do? Yay!

As if all this weren't enough, there's something more - she's got depth too.
Did you know she's my sistah?
Well, not flesh and blood...we are Sisters in the Lord!  :)

Here's what I made for her Bday - Happy Birthday, Polka Dot Style (see - multi-functional title!) ;-)


Want to know a little more?
OK.

What IS that little box??  You know, the one that has a chocolate on top and says "All you need in life is a friend who has chocolate."


It's one of those items in my collection in the garage (much to hubby's dismay) for a someday I'll find a way to use this project. ;-)  YAY - I've used one!  Now I only have 20 billion more of them to use (jk)...it's a little gerber baby food container, and I can't wait to show hubby this pic. ;-)


And what does that card look like on the inside?


It's actually a gift card holder and card all in one! :)


Well, what do you think?


Thanks for stopping by, and have a GREAT day (and weekend)! :)
Crystal

Thursday, March 24, 2011

Sweet Thanks

Awhile back, you may remember me talking writing about having a SAB (Sale-A-Bration) party at my home. LOTS of work as a demo, but oh so fun that night as we gathered! :)

Every once in awhile, I like to put a little 'thank you' treat with my stampin' friends' orders. It's usually when I have an Open House, but I decided to this time also. :)

Here's what I did for that party (Mar 1):


Easy-peasy.

SU's small cello bags, filled with sour watermelons (YUM!), added white satin ribbon, added tag.

Tag - "thank you" stamped from Because I Care (Hostess set) in Regal Rose ink on Whisper White cardstock. Punched with lg. oval punch, scallop oval in Pear Pizzazz behind it.


Well, what do you think?

Thanks so much for stopping by, and have a GREAT day! :)
Crystal

Friday, February 4, 2011

Valentine Ideas - Day 4

Hello, and welcome to Day 4 in my series of Valentine Ideas!
Be sure to check out the past days, too! :)

Today's project is pretty much the same as one from last year, but I felt that I should share the idea again, just decorated differently! I have more readers than last year at this time, so maybe some of you haven't seen it! :)

Someone asked me for the dimensions awhile back, but I was so sad to tell her that I couldn't find the original! Seriously, couldn't find it - STILL can't. :(  However, I found another one decorated for a birthday, so I was able to at least take the outside dimensions & scoring from that.

Ready? OK


Here's a few more views:


Want to know what I did?
Okay, I'll tell ya - it's real simple! :)

3.25" x 8.5" pc. cardstock
Score at 1" and 5"
Fold on score lines.
Staple candy under bottom flap.
Decorate with ribbon to cover staple.
Decorate as desired, and slip top flap into botttom - voila! :)

FYI: Real Red, Chocolate Chip, and Whisper White cardstock. The whisper White cardstock is embossed with our elegant lines embossing folder. I originally stamped the heart from "Filled With Love" onto the red cardstock & punched it out...but thought it looked too busy against the embossing, so I turned it over, and was much happier. :)

That's IT!!

Well, what do you think?

Thanks so much for stopping by, and have a GREAT day! :)
Crystal

Thursday, February 3, 2011

Valentine Ideas - Day 3

Hello, and welcome to Day 3! :)

Today will be a short one...I've been in town most of the day, and visiting time with my momma in the afternoon. :)

I've got two projects for you today, and then it's time to hit this house before hubby comes home, lol!

Day 3


Want more info?
OK! :)


4pc. Hershey's Nugget pkg:
4 nuggets tucked into our small cello bag, folded over,wrapped the red satin ribbon around and up, tying off with our hemp twine. The image is a heart stamped from the set "Filled With Love", then punched with our wide heart punch, and up on dimensionals.

Peppermint Patty Sandwich:

Lots of punches used here! :)  I stamped the image from "Filled With Love," punched out with our 1 1/4" circle punch, layered with a Pretty in Pink 1 3/8" punch, and Real Red scallop punch. Attach to peppermint patty with sticky strip, attach another red scallop to the bottom side, making a "sandwich."  There are actually a few images from this set that would work in the center! :)

Well, what do you think?
Be sure to come back tomorrow for more ideas! :)

Thanks so much for stopping by, and have a GREAT day! :)
Crystal

Wednesday, February 2, 2011

Valentine Ideas - Day 2

Okay, so you'll definitely get your money's viewing's worth today! :)
I've included THREE projects!!

FYI: I didn't think about making this a series until today, but yesterday's post could definitely be part of the series, so we'll just pretend it is, even though it's not titled that way, lol! :)

Boy, I tell ya what...it felt SO good to create today!  I've got some things I'm really excited to show you today, so I'll just dig right in! :)

Day 1


A 3x3 card, candy packet, and valentine slider.

Want to see some closeup and more details?  OK! :)


First, the 3x3 card:
             
Here, I used the set "Filled with Love," carefully coloring the images with my Real Red & Old Olive ink pads. This is actually a single stamp (heart with stem), that I've stamped 3 times. Created my own "love" tag with a random SU stamp to complete the tied linen thread.


Now, the candy treat:
For this idea, I folded a piece of Real Red cardstock over one of our cello bags filled with cinnamon disks. The sentiment is from the same set ("Filled With Love"), stamped in white craft ink.  The hearts are from the set "I {Heart} Hearts."  With the flourish one, I inked it in red, stamped off once, then inked the edges again and stamped onto whisper white cardstock - just gives it a little variance instead of a solid image. The other heart is inked & stamped full strength onto white cardstock as well.

Finally, the Valentine Slider:


And an open view (pulled out):

Our Real Red cardstock cut, scored, and stamped with "Confetti" in white craft ink. The layers behind the sentiment (from "Filled With Love") are Pretty in Pink, and Pink Pirouette. The heart circle in the middle of the "O" is punched with our 3/4" punch, a pink brad in the center, and up on a dimensional. The "you" is handwritten. The ribbon is Pretty in Pink taffeta. It took me awhile to figure out the dimensions/scoring based on an old example from my stash...hopefully I've got it figured out now, lol! Would you like to see a tutorial on my blog? Let me know! :)

Well, what do you think? Would LOVE to hear from you! :)
Be sure to stop by tomorrow, too!

Thank you so much for stopping by, and have a GREAT day! :)
Crystal

Tuesday, February 1, 2011

A Valentine Treat

Helloooo! (do I hear an echo?)
Wouldn't be surprised! lol
Sorry it's taken me a bit to get back on here - you know how that goes, dontcha?  Life is busy right now, and I just haven't had time to stamp/create.

I'm here today to show ya somethin', though! YAY!
I think it's been 1-2 years since I've made this little treat holder, but I thought it would be fun to make it Valentine themed this time around. :)


It stands just over 3.5" tall.


Well, what do you think?

The Small Print
Cardstock: Real Red, Whisper White
Paper: Sending Love DSP (last year's)
Accessories: Scallop circle punch, 1 3/8" circle punch, Heart to Heart punch, Real Red taffeta ribbon, Crop-A-Dile, Sticky strip
Other: Acetate

Thanks soooo much for stopping by, and have a GREAT day! :)
Crystal

Thursday, October 28, 2010

It's My Party

...and I'll Stamp if I want to, Stamp if I want to....
...you would stamp too, if it happened to YOU!

If you were invited to a Stampin' Up party of mine, you'd definitely be stamping something! :)

Below are the two projects the gals did (from start to finish) as free M&T's (Make n Takes):

First, a little treat bag type thing...


Here's the side view:


And now, a Christmas card.


Yes, it's a little early, but this party was instead of my Annual Holiday Open House, so I felt the need to include some Christmas. :)  It's basically the same card, just a flipped sketch. I let the gals decide what they wanted to do, and they also got to choose which stamp for "Merry Christmas."

Want the quick "how to"?  OK...

Thankful Thoughts Treat Holder - Cut out (2) Top Notes with our Big Shot & Top Note die (yep, they got to play with the Big Shot!), Fold bottom of bag downward, then cut bag down to 2 3/4". Attach to (1) of the Top Notes, punch with word window punch.  Decorate 2nd Top Note, then attach on top of bag, Line up and punch with Word Window punch again. Tie with ribbon.
Top Note: Crumb Cake cs
Vines: Baroque Motifs stamped in Old Olive
Pumpkin: Pumpkin Pie cardstock, Wide oval punch, sponged with Pumpkin Pie ink & sponge dauber. Stamped leaf from Autumn Harvest & cut out, Attatched linen thread bow.
Sentiment: Stamped from "Grateful Greetings" in Early Espresso Ink
Handle: Word Window punch, Old Olive grosgrain ribbon

Whew! Maybe it would've been easier to film a video for this one! lol

Merry Christmas Card
Cardstock: Cherry Cobbler, Always Artichoke, Very Vanilla
Designer Paper: Deck the Halls (mini catalog)
Ink: Early Espresso
Accessories: Cherry Cobbler seam binding ribbon, Scalloped oval and Large oval punches, Scallop trim punch, Dimensionals

Well, what do you think?!!  I'm dyin' to know! :)

Thanks so much for stopping by, and have a GREAT day! :)
Crystal

Monday, February 15, 2010

Valentine's Treat Tutorial

Armed with a cuppa joe and some Valentine's chocolate, (wink)
here I am with your Valentine's Treat Tutorial!
My computer's behaving for the moment, so I'm hoping to whip this out in no time! :)

Click HERE to see the finished product post first!

Are you ready?
OK, let's go!

Step 1:
Cut cardstock to 6 1/2" x 2 5/8"
 Score at 2 3/4" and 3 1/4"

Step 2:
Punch hole in center of middle panel
(I used my good 'ole Stampin' Up Tool kit)

Step 3:
Crease the score lines

Step 4
Punch top flap with slit punch.
Here's what you want it to be able to do:

Step 5:
Decorate as desired.
(flaps untucked and laid out flat)
On backside, daughter stamped "To/From" and wrote names.

Step 6:
Insert suckers.

Step 7:
Tuck bottom flap under top flap.
We added white curly ribbon at this point & tied into a bow. :)

Step 8:
Stand back and sigh with a smile.
Done! :)


This is a very kid-friendly project...
I only cut, scored, and punched.

3 year old inserted the suckers (gotta help!) :)
5 year old did the rest...this was for HER class, afterall! :)
(stamping, punching hearts, gluing, writing names, assembling)

NOTE: Measure your packaging before attempting.
  You may need to alter cardstock width (up to 3"?).
I like my treats to be snug...not so much cardstock overwhelming the project. :)

Well, what do you think?
 My 2nd Tutorial ever...may have to switch to video some day! lol

The Small Print:
Stamps: I {Heart} Hearts
Ink: Real Red
Cardstock: White
Accessories: SU tool kit, slit punch, Small heart punch, 2 way glue pen
Other: Suckers, Curling ribbon


Thanks for stopping by, and have a GREAT day! :)
Crystal