Showing posts with label Valentine's Day. Show all posts

Tuesday, February 14, 2012

A Valentine Treat!

HAPPY VALENTINE'S DAY!! :)

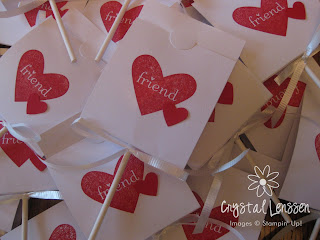
Thought I'd share what my daughter and I have been working on for the last couple of weeks (off and on). ;)  She really loved one of the Make'n Takes that I had the gals do at my recent SAB/Occasions Mini workshop, so that's what we did. I stocked up on Valentine M&Ms when they went on sale, and we got started.

Here's a view of the one my workshop gals made:

The Details:

* Cherry Cobbler cardstock, Whisper White cardstock punched with our Postage Stamp punch.

* Red heart is stamped with I {Heart} Hearts stamp set in Cherry Cobbler ink, then punched out with the Heart to Heart punch, and glued on. The smaller heart you see is Pretty in Pink cardstock punched with the Heart to Heart punch and glued on.

Insert M&Ms into plastic sleeve (SU's cello treat bags - a Holiday Mini carryover item), pull off backing, fold over. Fold tented cardstock over top, then staple. Add decor over top of staple, and VOILA! :)

Here's pictures of what my 2nd Grade daughter did - she changed it up a little! :)  Definitely knew what she wanted, no matter how much mom may have tried to talk her out of it (wink). You know what? She was totally right. So cute the way they are - she definitely has an eye for it. SERIOUS! I do ask her opinion from time to time, while I'm crafting, too.  I should've known they'd turn out cute. :)

What's the difference, you ask?

She wanted all RED toppers for the boys, and all PINKs for the girls. :) None of this mixing of red and pink. ;-)

Boys: Cherry Cobbler ink and cardstock

Girls: Melon Mambo ink and cardstock, Pretty in Pink cardstock

Before you get too excited, there aren't THAT many kids in her class. She wanted to add a few for her teacher, Principal, etc...

Here's a closeup of the backside. We stamped a "to/from" (from an old stamp set I refuse to get rid of), then she filled them all out.

Kinda glad to have all the piled-up treats out of the house now. ;-)


Oh, wait a minute!  You're wondering what my Pre-K daughter did for HER treats, aren't you?  I thought so. ;-)


Here's a little peek (yes, forgot to take an after picture):


We did the same thing my eldest (the now 2nd grader) and I did when she was in Kindergarten. Luckily, I wrote about it back then. :)

The only difference is a little bit off on color, and and I used red curling ribbon, curled...instead of what you see in this post HERE (contains a link to the tutorial, too!)


Well, what do you think? I'd love to hear from you! :)

Thank you so much for stopping by, and have a GREAT Valentine's Day! :)
Crystal

Tuesday, January 31, 2012

Ha ha ha...PUNNY!

Sooo....yes, I do finally have that punny card to share with you. :)

I started it a few weeks ago, and just finally sat down to finish it!  I couldn't decide whether to go super-simple, or add just a little more and still keep the "CAS" look. I decided on the latter - and really like it! :)

I have two girls, no boys. Of all my 10 neices and nephews, I have only TWO nephews! But, I liked this set anyways. ;-) A good friend knew this, and gave me the set for my birthday Christmas birthday...sorry, I can't remember now! lol  (My birthday is only 4 days before Christmas, so sometimes I get mixed up.)

Anywho...I'm finally ready to share it:
"I Dig You"
AACCCK! Love it. Sorry, I just do. :)

The base is Cherry Cobbler cardstock. I then added some texture (using Big Shot) to our brushed silver cardstock to make it look like the diamond plating on "tool/construction" type stuff.

In the loader bucket, you'll see some hearts from the Heart to Heart punch, the top one on a dimensional. :)  The sentiment "I Dig You" is punched out with our Word Window punch and mounted on a Modern Label punch in black. See those itty-bitty brads? LOVE EM!! They're a new item from the IB & Catalog this year...mini brads!

I'll be adding this to my Etsy Shop today...a great Valentine's card to purchase!

Well, what do you think?

Thanks so much for stopping by, and have a GREAT day! :)
Crystal

Monday, January 16, 2012

Just My "Type"

YAY!  I finally got to make a card last week. Sooooo glad! :)
It's very simple and to-the-point. Very punny, actually. ;-)

I used a new set from the Occasions Mini catalog (started on 1/4/2012)!
It's called "You're My Type," and it was love at first sight. :)


I stamped the typewriter on our Whisper White cardstock with Black Stazon ink. Due to the solid nature of the image, it took me..ahem...a few tries to get it just right. ;-)

Then, I inked up the sentiment with Basic Grey ink, because I wanted it to be slightly lighter than the black of the typewriter.


The heart is punched out of Cherry Cobbler cardstock with our Heart to Heart punch, and up on dimensional for a little something extra. :)


I'm adding it to my Etsy Shop today...so be sure to stop by if you're needing a card for someone - I've got Valentine's cards, as well as many other occasions too! :)

Feels good to be creating again, and I hope to be back tomorrow with another "punny" card (from a different set). It's halfway done - hoping to finish it today - yay! :)

Oh, by the way...you can go here to see the Occasions Mini catalog. Ordering through me online is available 24-7!


Well, what do you think? I'd love to hear from ya. :)

Thanks so much for stopping by, and have a GREAT day! :)
Crystal

Friday, February 18, 2011

Chocolate Friend

Do you like chocolate? I do(Remember, I told you in this post?)
Do you have friends that like chocolate? I do.
Thus, the need for the new set, "Eat Chocolate". ;-)

Here's what I made with it to give to a friend recently, just because:

Want to see the backside? Ok. :)
Ha ha ha - love it! :)

Here's the info:
  • Line up 3 Hershey's Miniatures in bottom of SU (small) cello bag, fold over extra cello, adhering into place.
  • Make a belly band out of satin ribbon.
  • Make a tag: Stamped "All you need in life is a friend who has chocolate", then punched it out with the decorative label punch, punched out (2) additional pieces in Cherry Cobbler. I adhered them on back of the white label, to "frame" it a bit. It's hardly noticeable in the pic...much easier IRL. :)
  • On the backside is the sentiment "I'm that friend", punched with our word window punch.
That's it!  Easy-peasy!

Well, what do you think?

Thanks so much for stopping by, and have a GREAT day! :)
Crystal

Monday, February 14, 2011

HAPPY VALENTINE'S DAY!

Hey all!

Happy Monday, and Happy Valentine's Day to ya! :)
It's been a busy weekend around here, and a busy day so far today too!
Would you like a peek at some of what's been going on? Ok. :)
Click on each pic if you'd like to see a little closer up. :)

First, my 1st grader's project:


Little sis was so excited to help...daddy lent helping hands for a few difficult punches. ;-)
So excited when she'd get one done with her own strength, lol!

Next, mom's job was to stamp the backsides while 1st Grader & lil' sis filled bags with candy.


1st Grader then wrote all the names on the backsides, and mom twisted them to the package:

 
DONE! :)

AND NOW...for the Pre-K treats (don't worry, less steps - wink):

She stamped and punched the tags on her own...
Then mom stamped to/from, and she filled in the names:


We then put them into bags, and added the tags! :)

DONE! :)
Among other projects, here's what I started yesterday, then finished this morning...was a little worried I wouldn't get enough cut out of the pan! lol  Sorry about pic quality on the 2nd one...it's those lovely florescent kitchen lights, lol!  They looked really YUMMO in real life. ;-)
 
Well, that's all for today...more projects to complete! :)

Thanks so much for stopping by, and have a GREAT day! :)
Crystal

Friday, February 4, 2011

Valentine Ideas - Day 4

Hello, and welcome to Day 4 in my series of Valentine Ideas!
Be sure to check out the past days, too! :)

Today's project is pretty much the same as one from last year, but I felt that I should share the idea again, just decorated differently! I have more readers than last year at this time, so maybe some of you haven't seen it! :)

Someone asked me for the dimensions awhile back, but I was so sad to tell her that I couldn't find the original! Seriously, couldn't find it - STILL can't. :(  However, I found another one decorated for a birthday, so I was able to at least take the outside dimensions & scoring from that.

Ready? OK


Here's a few more views:


Want to know what I did?
Okay, I'll tell ya - it's real simple! :)

3.25" x 8.5" pc. cardstock
Score at 1" and 5"
Fold on score lines.
Staple candy under bottom flap.
Decorate with ribbon to cover staple.
Decorate as desired, and slip top flap into botttom - voila! :)

FYI: Real Red, Chocolate Chip, and Whisper White cardstock. The whisper White cardstock is embossed with our elegant lines embossing folder. I originally stamped the heart from "Filled With Love" onto the red cardstock & punched it out...but thought it looked too busy against the embossing, so I turned it over, and was much happier. :)

That's IT!!

Well, what do you think?

Thanks so much for stopping by, and have a GREAT day! :)
Crystal

Thursday, February 3, 2011

Valentine Ideas - Day 3

Hello, and welcome to Day 3! :)

Today will be a short one...I've been in town most of the day, and visiting time with my momma in the afternoon. :)

I've got two projects for you today, and then it's time to hit this house before hubby comes home, lol!

Day 3


Want more info?
OK! :)


4pc. Hershey's Nugget pkg:
4 nuggets tucked into our small cello bag, folded over,wrapped the red satin ribbon around and up, tying off with our hemp twine. The image is a heart stamped from the set "Filled With Love", then punched with our wide heart punch, and up on dimensionals.

Peppermint Patty Sandwich:

Lots of punches used here! :)  I stamped the image from "Filled With Love," punched out with our 1 1/4" circle punch, layered with a Pretty in Pink 1 3/8" punch, and Real Red scallop punch. Attach to peppermint patty with sticky strip, attach another red scallop to the bottom side, making a "sandwich."  There are actually a few images from this set that would work in the center! :)

Well, what do you think?
Be sure to come back tomorrow for more ideas! :)

Thanks so much for stopping by, and have a GREAT day! :)
Crystal

Wednesday, February 2, 2011

Valentine Ideas - Day 2

Okay, so you'll definitely get your money's viewing's worth today! :)
I've included THREE projects!!

FYI: I didn't think about making this a series until today, but yesterday's post could definitely be part of the series, so we'll just pretend it is, even though it's not titled that way, lol! :)

Boy, I tell ya what...it felt SO good to create today!  I've got some things I'm really excited to show you today, so I'll just dig right in! :)

Day 1


A 3x3 card, candy packet, and valentine slider.

Want to see some closeup and more details?  OK! :)


First, the 3x3 card:
             
Here, I used the set "Filled with Love," carefully coloring the images with my Real Red & Old Olive ink pads. This is actually a single stamp (heart with stem), that I've stamped 3 times. Created my own "love" tag with a random SU stamp to complete the tied linen thread.


Now, the candy treat:
For this idea, I folded a piece of Real Red cardstock over one of our cello bags filled with cinnamon disks. The sentiment is from the same set ("Filled With Love"), stamped in white craft ink.  The hearts are from the set "I {Heart} Hearts."  With the flourish one, I inked it in red, stamped off once, then inked the edges again and stamped onto whisper white cardstock - just gives it a little variance instead of a solid image. The other heart is inked & stamped full strength onto white cardstock as well.

Finally, the Valentine Slider:


And an open view (pulled out):

Our Real Red cardstock cut, scored, and stamped with "Confetti" in white craft ink. The layers behind the sentiment (from "Filled With Love") are Pretty in Pink, and Pink Pirouette. The heart circle in the middle of the "O" is punched with our 3/4" punch, a pink brad in the center, and up on a dimensional. The "you" is handwritten. The ribbon is Pretty in Pink taffeta. It took me awhile to figure out the dimensions/scoring based on an old example from my stash...hopefully I've got it figured out now, lol! Would you like to see a tutorial on my blog? Let me know! :)

Well, what do you think? Would LOVE to hear from you! :)
Be sure to stop by tomorrow, too!

Thank you so much for stopping by, and have a GREAT day! :)
Crystal

Tuesday, February 1, 2011

A Valentine Treat

Helloooo! (do I hear an echo?)
Wouldn't be surprised! lol
Sorry it's taken me a bit to get back on here - you know how that goes, dontcha?  Life is busy right now, and I just haven't had time to stamp/create.

I'm here today to show ya somethin', though! YAY!
I think it's been 1-2 years since I've made this little treat holder, but I thought it would be fun to make it Valentine themed this time around. :)


It stands just over 3.5" tall.


Well, what do you think?

The Small Print
Cardstock: Real Red, Whisper White
Paper: Sending Love DSP (last year's)
Accessories: Scallop circle punch, 1 3/8" circle punch, Heart to Heart punch, Real Red taffeta ribbon, Crop-A-Dile, Sticky strip
Other: Acetate

Thanks soooo much for stopping by, and have a GREAT day! :)
Crystal

Tuesday, January 11, 2011

Pretty Cherry Mambo!

Oh, I'm quite excited to show you today's project, and it's a 2-Fer! :)
Which means...you get to see 2 projects from one challenge! :)

I'll admit, when I first saw the Color Challenge at SCS, I was a little hesitant. I didn't really like it. It seemed like it would be "off"....but it wasn't, and I SO love it! :)

And that, my friends, is why you get to see 2 projects today. Cause I was havin' so much fun! I can't even decide which one to share first!!! lol

Oh wait. I forgot to tell you the colors.
Pretty in Pink
Cherry Cobbler
Melon Mambo
White/Vanilla

Card #1 - Pretty Cherry Truck 


This one is used a set I've had for-EVAH, called "Loads of Love"!  It used to be my go-to set for masculine cards, but I haven't used it in way too long. The main image is, of course, popped up on dimensionals. ;-)  I used shimmery white cs on this one, whisper white on the next.

Card #2 - Pretty Cherry Love


This card was made with the set "Love You Much", and I had fun with this one, too, but couldn't decide whether to place the main image like this, or turn the card horizontal and do something different than the norm...I'm so boring that way, lol.  Maybe I'll just make another one and do both! :)  (Main image is, of course, up on dimensionals)

Well, what do you think?  Do you have a favorite?

The Small Print (Stampin' Up)
Stamps: Loads of Love, Love You Much
Ink: Black Stazon
Cardstock: Cherry Cobbler, Pretty in Pink, Melon Mambo, Whisper White, Shimmery White
Accessories: Watercolor Wonder crayons, Aquapainter, SU markers, Ink pad lids, Dimensionals, Big Shot, Polka Dots EF, Cherry Cobbler seam binding, Melon Mambo gg ribbon
Technique: Watercoloring

Thanks so much for stopping by, and have a GREAT day! :)
Crystal

Saturday, September 25, 2010

GCK - Be Mine, Valentine

Welcome to Day 4 of my Greeting Card Kids Series!
This is the LAST one....(yay, they say!)

GCK #4 - Be Mine, Valentine


I really like this one. A simple design, yes. I now see the angle on this makes the lace look funny on one side, but oh well.  Yup, handmade 'lace' if you want to call it that.  It was really quite fun to finally try this technique.

The main image is watercolored using my SU markers and aquapainter, the little white petticoat showing under her dress dressed up with liquid applique.  I punched out a strip of Poppy Parade cs with our Eyelet Border punch. Ran it through the crimper, then adhered it to the back of the circle.  The paper I used is called "Pawsitively Prints II", and I think this particular sheet is just perfect for this card! :)

Well, I suppose that is all.  Hope you've enjoyed my series...
Dare I ask what you think? :)

The Small Print (All Stampin' Up)
Stamps: Greeting Card Kids
Ink: Black Stazon
Cardstock/Paper: Poppy Parade, Watercolor, Pawsitively Prints II
Accessories: SU markers, Aquapainter, Eyelet Border punch, Sticky strip, Dimensionals

Thanks so much for stopping by, and have a GREAT day! :)
Crystal

Tuesday, February 16, 2010

Love You Much

So...one more Valentine's post.  Last one. ;-)
Remember, my computer was acting up during Valentine's weekend, so I couldn't show you this stuff, but I still want to! :)

Here's the Valentine I made for my honey.
He's the BEST hubby...honestly, sometimes I wonder what I did to deserve such a great guy!!


I know, I know.  It's PINK.  But the bordering dark Chocolate chip makes up for it, right? lol   I couldn't resist when I saw this DSP scrap in my papers...it's got lovebirds on it....it's PERFECT! ;-)

The paper on this easel card is a retired DSP from Stampin' Up! called "Candy Lane".  Pretty simple card to make, with WOW results.  The sentiment is from "Well Scripted" in the Occasions catalog, the small pink heart is a punch in same catalog, and the pretty scalloped border you see is SU's scallop trim border -- you can get it for FREE during SAB!!  :)

Well, what do you think?

The Small Print
Stamps: Well Scripted
Ink: Chocolate Chip

Paper/Cardstock: Candy Lane DSP, Chocolate Chip, Pirouette Pink, White
Accessories: Small heart punch, Scalloped trim punch, dimensional, sticky strip, Paper piercer
Technique: Easel card


Thanks for stopping by, and have a GREAT day! :)
Crystal

Monday, February 15, 2010

Valentine's Treat Tutorial

Armed with a cuppa joe and some Valentine's chocolate, (wink)
here I am with your Valentine's Treat Tutorial!
My computer's behaving for the moment, so I'm hoping to whip this out in no time! :)

Click HERE to see the finished product post first!

Are you ready?
OK, let's go!

Step 1:
Cut cardstock to 6 1/2" x 2 5/8"
 Score at 2 3/4" and 3 1/4"

Step 2:
Punch hole in center of middle panel
(I used my good 'ole Stampin' Up Tool kit)

Step 3:
Crease the score lines

Step 4
Punch top flap with slit punch.
Here's what you want it to be able to do:

Step 5:
Decorate as desired.
(flaps untucked and laid out flat)
On backside, daughter stamped "To/From" and wrote names.

Step 6:
Insert suckers.

Step 7:
Tuck bottom flap under top flap.
We added white curly ribbon at this point & tied into a bow. :)

Step 8:
Stand back and sigh with a smile.
Done! :)


This is a very kid-friendly project...
I only cut, scored, and punched.

3 year old inserted the suckers (gotta help!) :)
5 year old did the rest...this was for HER class, afterall! :)
(stamping, punching hearts, gluing, writing names, assembling)

NOTE: Measure your packaging before attempting.
  You may need to alter cardstock width (up to 3"?).
I like my treats to be snug...not so much cardstock overwhelming the project. :)

Well, what do you think?
 My 2nd Tutorial ever...may have to switch to video some day! lol

The Small Print:
Stamps: I {Heart} Hearts
Ink: Real Red
Cardstock: White
Accessories: SU tool kit, slit punch, Small heart punch, 2 way glue pen
Other: Suckers, Curling ribbon


Thanks for stopping by, and have a GREAT day! :)
Crystal

Sunday, February 14, 2010

HAPPY Valentine's Day!

Hello and Happy Valentine's Day to you all! :)

As promised, here's the project my daughters and I worked on...
The tutorial will have to wait because our computer is acting up.
Not sure if it's the computer, the internet, or BOTH.  Probably both. ;-)

Took forever for me to even get just this short post on here! lol


Oh, you were looking for the project, not my daughters? lol ;-) 
Okay...here it is:


Hoping to post the tutorial tomorrow...gonna clear some cookies (the computer kind)...hoping it's all good after that! :)

Back tomorrow with more info! :)
***EDITED TO ADD: Here's a link to the TUTORIAL***

Thanks for stopping by, and have a GREAT day!
Crystal

Wednesday, February 3, 2010

Matchbook Treat Yumminess!

Okay, so yesterday I shared a disaster project. ;-)
Today...ahhh...insane yumminess! :)

THIS is one of those jump for joy projects.
It appears simple (and it is!)...even it's simplicity brings me joy! lol

This is one of the projects the gals did at my party this last weekend.


See?!  Insane yumminess.

AHHH...there's just something about the colors of Chocolate Chip, Real Red, and Vanilla.  It's just...((sigh))...bliss.  Maybe because there's chocolate in the mix? lol j/k 

Really, it's even more yummy IRL.  This gorgeous paper is from the DSP "Sending Love"...and it has glitter on the paper!!!  Oh, and that lucious red satin ribbon...ahh...

Lest you think this is just simply a card...I need to show you the inside:


Seee....more yumminess. ;-)
I'm curious as to what you think of it?

The Small Print (All Stampin' Up)
Stamps: I {Heart} Hearts (Occasions mini)
Paper: Sending Love Specialty DSP (Occasions mini), Chocolate Chip & Very Vanilla cardstock

Ink: Real Red
Accessories: 5/8" Real Red satin ribbon, Heart to Heart punch, Dimensionals
Other: M&Ms, Stapler

*Remember...Stampin' Up is donating $2 from the sale of every I {Heart} Hearts stamp set to the American Red Cross for disaster relief in Haiti.  Contact me to place your order!

Thanks for stopping by, and have a GREAT day!
Crystal